|
For starters, as you
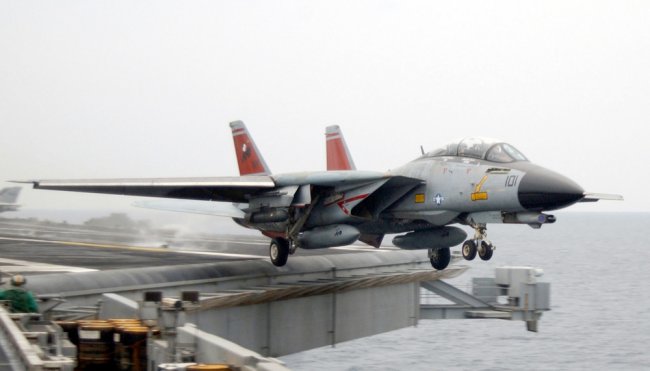
can see, this aircraft was build with the gear up. I have five tomcats
sitting on their landing gear, so I decided to display this majestic bird
"in-flight." Now I just have to decide whether to build a
display stand or to hang her from the ceiling...
Anyway, On to my
favorite part - Painting=) The canopy was masked using parafilm and a base
coat of Model Masters Enamel was applied to the entire aircraft using the usual
light ghost gray, dark ghost gray, and medium gray three-tone scheme. Once
dry, the panel lines and some area in between was sprayed with a Euro I
Gray/dark brown/black mix. I used black on my previous two Tomcats, but
that didn't have quite the look I was looking for. This mix worked much
better.
|
Click on
images below to see larger images
|
|

|
 |

|
Once the dark lines
were dry, a layer of very-well thinned matching color was sprayed over each
section. I found it best to go over everything multiple times with
extremely thin layers, which helps you to gauge how much of the underlying color
will show through. Since this was the CAG aircraft, I didn't leave her too
dirty since these are usually kept in better repair than the rest of the air
group. For good measure, I kept this picture of the real thing on my
desktop. As everyone has said before, reference pictures are invaluable!
A layer of Model Masters clear
glossy laquer came next, which set up the cat for the VF-31 decals I got from
Yellowhammer Models. These decals were crisp and very clearly printed.
The only problem I came across, however, was with the large red decals that go
on the tails. I don't know why, but when I put them in water, two of the
four cracked right down the middle. A little decal set and a lot of
patience later, the cracks aren't noticable, but I've never had that happen
before without decals that weren't at least a decade old. Hmmm... I
also had to make a quarted to small Felix decals for the drop tanks, which did
not come with the kit. This was my first attempt at making decals and they
turned out ok, just a little (well, a lot) too thick. Live and learn, but
I think they look pretty good.
|
Click on
images below to see larger images
|
|

|
 |

|
After applying the decals, a
clear coat of Model Masters lusterless lacquer was applied (not over the red
tails though). The bare metal areas (leading wing edges, air intakes,
gun port) were now painted and the black area was painted using Tamiya
acrylic gloss black. The weapons came last. I had planned on
mounting two GBU-24s, but I received an email from an ARC goer, Paolo, who said
that he spoke with a VF-31 RIO who said that they NEVER carried GBU-24s
side-by-side. Heartbroken, with a finished aircraft on the table and
two finished bombs, I set out to find some reference photos of cats
carrying two. After numerous hours over several days, I
realized that he was right. "Oh well," I thought, "one
2000lb bomb is cooler than 2x1000lb bombs any day of the week!"
So I mounted one on the left side of the aircraft (the side that had it
in EVERY single picture I found) and I think it looks great.
Thanks Paolo!!! Anyway, now that it's finished, it's my opinion that it
was well worth the effort and painful price tag when compared to the Revell
kits. The shape and quality isn't top notch, but with some TLC this kit
has become the center of my collection. Now onto my next big project - the
1/32 Tamiya F-15J with Two Bobs Shin Ruyu decals. Stay tuned!
Eric
|
Click on
images below to see larger images
|
|

|

|
 |
 |
|
|