|
|||||||||||||||||||||
|
|
|
|||||||||||||||||||||
|
|
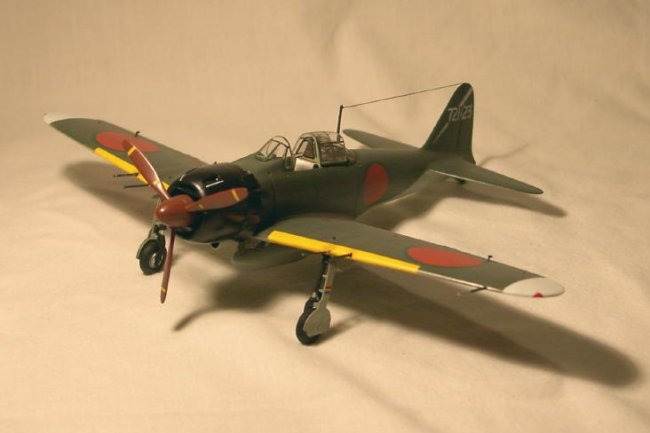
This is the old Tamiya 1/48 kit. I picked it up in a trade well over a year ago. It was only the sixth kit I built since returning to the hobby, and the first one I felt came out well.
Painting was done over several sessions working with Gunze paints thinned with rubbing alcohol. First I sprayed the yellow leading edges and masked with tape. Next was the underside. When dry, I masked with Tamiya tape everywhere required except the radius leading to and from the horizontal stabilizers. For these areas I made masks with construction paper that I robbed from my kids’ closet. When I was happy with the masking I put down the green. After leaving it 48 hours to really cure well, I sprayed a couple of light coats of future in preparation for decaling. One of the reasons I like Gunze semi-gloss paints is that they spray so well that future is almost not required to achieve a surface finish good enough for silver-free decals. The Areomaster decals went down extremely well with only a little Micro-Sol to help them, I experienced no problems at all with wrinkling or silvering. I used the kit decals for stencils and colour stripes for the undercarriage and prop blades. Once the decals were dry and the residue wiped off I gave it another light coat of Future to seal them all in before dulling it all down with dullcoat.
Somewhere
at about this point I will have attached the landing gear and other bits that I
will almost always knock off again before the model is completed. I
had planned this aircraft to be depicted as a nearly new example so I kept
weathering to a minimum. I don’t
usually use a wash as I don’t like the patchwork effect that gives to the
panel lines. Almost all my
weathering is done with pastels, as was the case with the Zero.
I like to apply the pastels to the dullcoat before it is completely dry,
within an hour of application, as I it helps their application, makes them look
more “part” of the model, and certainly prevents accidental rubbing off
later. When the pastels were done I
gave it all one more shot of dullcoat. I wish I could claim to be the world's greatest detail painter... but I can't. The instrument panel is a decal, one of the best instrument panel decals I've ever seen. The panel itself is flat, no raised detail, so all I had to do paint it and set the decal down. I wish all panel decals were like this, I'd never have to paint one again! There it is. I really enjoyed this kit, I have another in the “when-are-you-going-to-have-time-build-all-those-models” pile, which I will get around to some time. That one will have a slightly more ambitious colour scheme. Mark Beckwith
|
|
Photos and text © by Mark Beckwith